Drone and UAV Technology Reviews, Articles, News, Build Logs
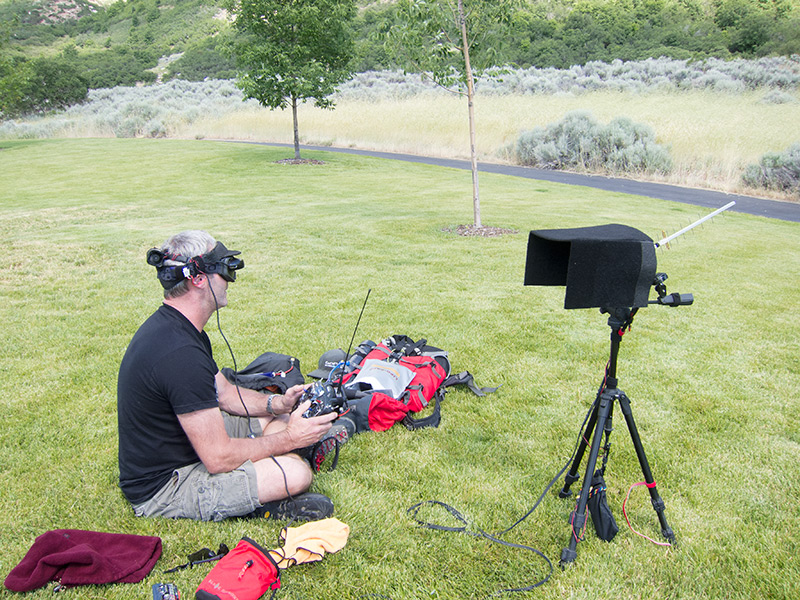
I took the family to a local park for a picnic yesterday. I saw a guy sitting in the grass with what looked to have his own grill. As I got closer I realized the grill was actually an FPV monitor with a cover, and a huge antenna. The guy had all sorts of crazy RC gear, with range extenders. I talked to him and he told me he was getting a 7000 foot range with that setup. Wow.
He was flying a pancake style quadcopter. It was a “Team Blacksheep” copter with all sorts of mods. This unit is basically a DJI Flamewheel 450 modification. The body is more elongated and the GoPro mount toward the front. That way the props don’t get in the picture. He also had a separate FPV camera, but could switch between that and the GoPro on his monitor.
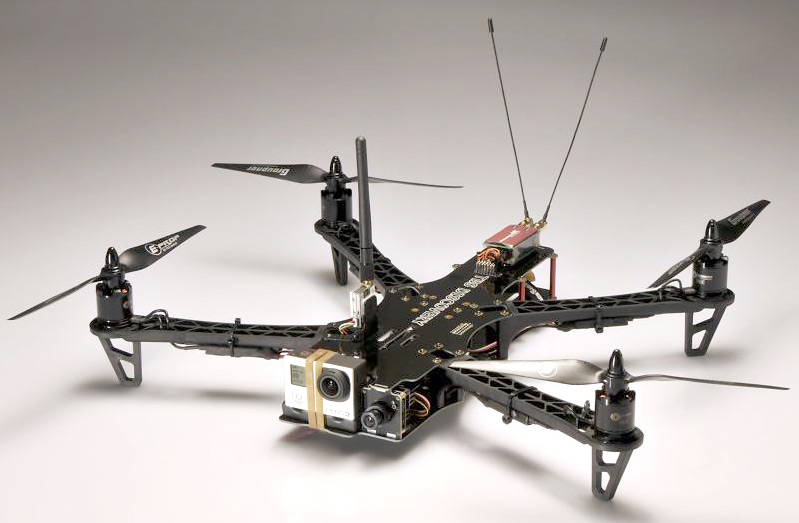
Team Black Sheep Quadcopter
I was VERY impressed with his quadcopter’s performance. I had thought of bringing my Phantom up to this park, but the winds were high enough that I would not want to fly. His copter flew as if there were no winds at all. There were literally NO jumps or spazzy horizontal movements, unlike my quad. I’m sure it is a combination of a lot of factors, but it made me want to get rid of my Phantom and build a setup like this one for my small bird. I could easily gut my Phantom and use the parts to build a bird like this.
His quad was running Naza-Lite, carbon fiber props, and it looked like T-Motors.
Perhaps the coolest and most geeky thing I’ve ever seen was the guy’s FPV goggles. He built a cooling system for them which had a cooling fan and “ductwork.”
 I got Gordon’s number, and hope to pick his brain one of these days. He knows the FPV thing, and that’s a road I need to go down with the big bird.
A couple of posts ago in Bird Down I described my terrible carelessness and pilot error, resulting in the horrific crash and damage to my DJI Phantom 1.2 quadcopter.
Many have requested video of the crash and I finally dumped it from the GoPro. Here it is.
I’m now waiting for parts.
For a few day’s I’ve been stumped on getting my motors/esc’s “throttle calibrated.” This is a process where you basically need to allow the motors to “know” what the throttle range is, from 0 to 100%.
In perhaps one of the most boneheaded parts of my build I was trying to calibrate motor one, which is on the front right of the hexacopter. No matter what I tried the ESC just beeped forever. To confirm that I had my transmitter and receiver actually set up right, I bought a cheap servo at a local hobby shop and hooked it up to the receiver’s throttle output. Sure enough, the servo woked. That eliminated the radio/receiver as the issue.
I started thinking perhaps my ESC wires were mixed up, but I put numbers on all of them when I installed them to avoid mixing them up. At that point I looked under the bird and saw the #1 on the front LEFT arm. What an idiot! I had the bird upside down so the front left was motor #1! OMG!!!
After that I was quickly able to calibrate 5 of the 6 motors. Motor #3 would not receive any signal. So I got a multi-meter out to test continuity of the cables. The signal wire (white) on #3 was bad. No connection from one end to the other. This is a total pain as I would have to pull out the ESC wires from the arms and re-feed a replacement through. Then in a brilliant revelation, I tied some string to the old wires. I pulled the string through the arm as I pulled out the old wiring. Then I attached the new wires to the string and threaded it through again. Voila. Save myself the mega-hassle of trying to fish wires through.
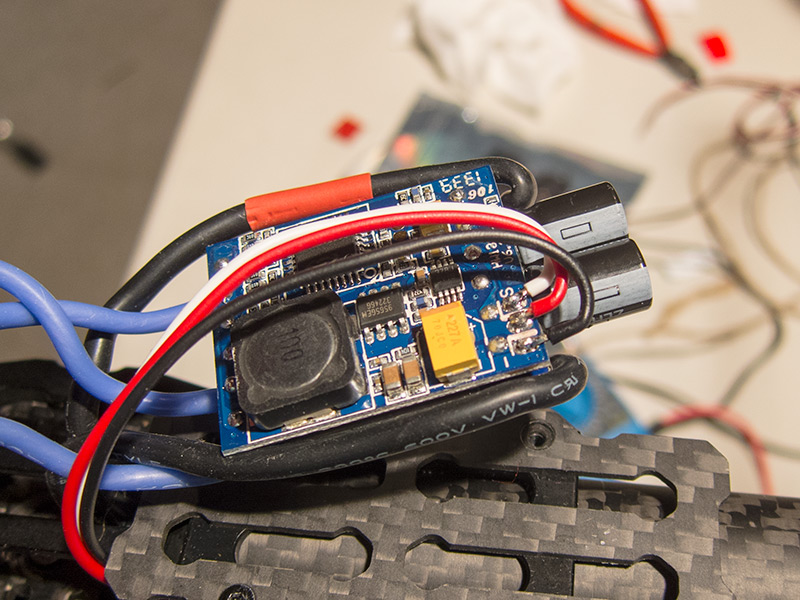
Re-wired ESC
I then soldered the new wire to the ESC (photo), and put a servo plug on the other end. Once that was done motor #3 recognized the receiver and I was able to do the final calibration.
On to motor configuration!