Drone and UAV Technology Reviews, Articles, News, Build Logs
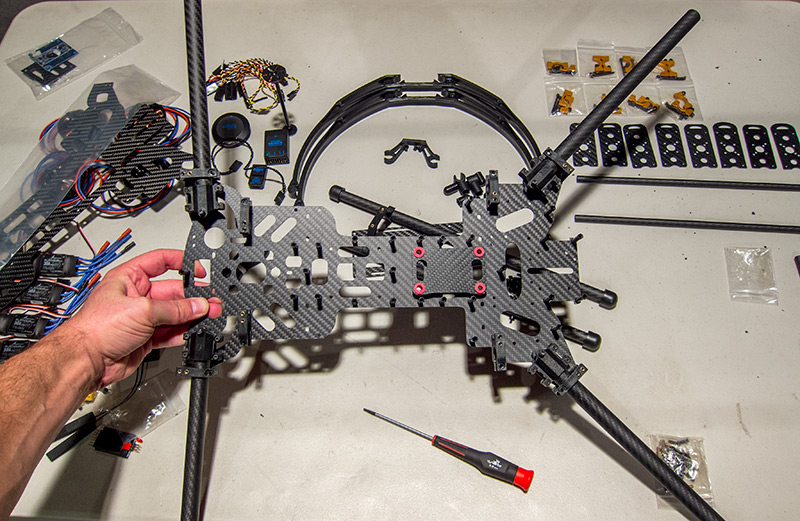
Strange behavior in my Alien last night. Finally tried a test flight of the new setup with my gimbal mount forward and battery back a tiny bit. This is to attempt to get the props out of the video/photo frame.
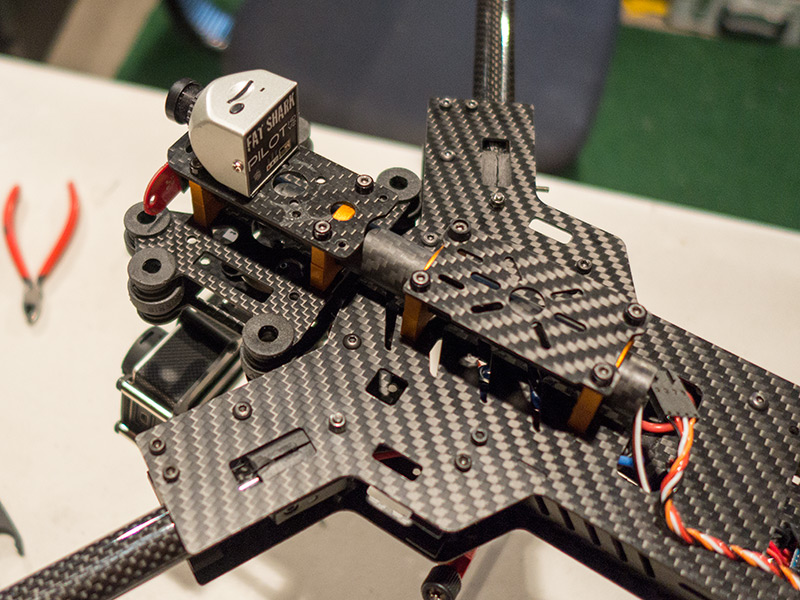
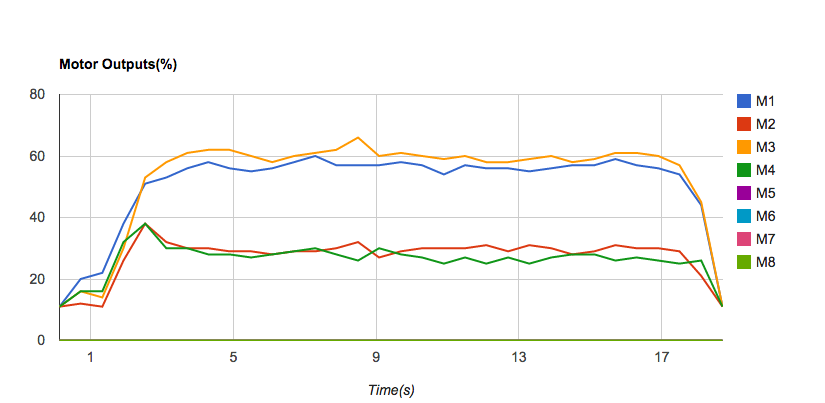
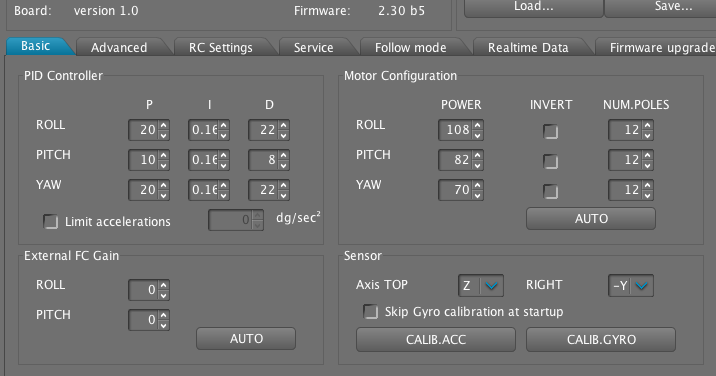
On take off my bird would not yaw clockwise, only counter. And it would not hold position. Luckily I was able to land it without doing any damage as I had minimal control. I recalibrated the GPS/compass but still issues. A look at my motor outputs (photo below) shows the clockwise motors are at a much lower output than the other two.
Because of this event I decided to upgrade the firmware on the MiniX flight controller and will probably go through all the stick calibrations again. More testing soon.
Below is a reader’s digest version of the steps I’ve gone through to get decent GoPro video with my 680mm Alien H4 quadcopter. I’ve been doing some “question and answer” on some of my builds and this would apply to a recent reader’s question:
“How do you test for vibrations? Have no clue how to do that.”
I can’t remember when I started building this Alien 680mm quadcopter. I had it built quite quickly, but flipped it on its maiden flight because of having some motor cables mixed up. That flip, or a later crash may have been part of the cause of my frustrations with getting decent video out of the Arris CM3000PRO 3-axis GoPro gimbal setup.
Balancing Multirotor Propellers and Motors
I’ve been going nuts trying to get this bird to produce lower vibrations and good enough video quality with a GoPro. I’ve been fighting GoPro jello, the appearance of lines, jiggling, and vibration in the video. The cause is typically too much vibration coming from the motors and props of the bird. That vibration is due to the props not being balanced and/or the motors not being balanced.
I spent literally DAYS trying to balance the motors on this quadcopter, Sunnysky 4110S/400kv motors. There are a few ways one can balance motors. One popular way is to use an app for an Android or iOS smartphone which measures vibration. You can attach the phone to the motor arm and view the vibration levels (and also note the audible vibration with your ears). Put a small piece of tape on the side of the motor and spin it up and watch the meters. Move the tape and see if the levels get better or worse. Tape, analyze, move tape, analyze, repeat until vibrations are at their lowest.
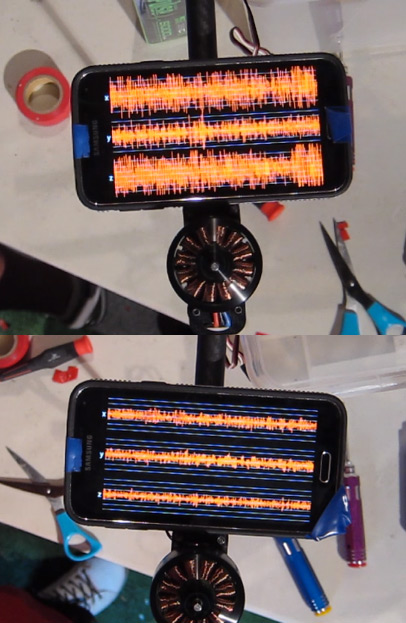
The photo above shows two measurements I took with my Samsung Galaxy S5 and a vibration app. The top one is an unbalanced or bad motor, and the bottom one is balanced.
Here’s a sample video comparing one motor which was bad (below) and one good new one:
After mucking with them for hours I finally decided that the motors were either defective, or damaged in the flip or crash since they vibrated badly no matter how much I attempted to balance them. I thought two motors were bad so I ordered two new ones. Once I replaced the two rear motors with new ones the difference was huge, enough to make me order two more and replace them all.
Once the props were balanced and the new motors installed and balanced (not much balance needed), the video quality was greatly improved. I was moving the right direction. But it was nowhere near good enough. Still a lot of jello, bouncing, and unusable results.
Tweaking Gimbal’s Physical and Digital Setup
I did dozens of test flights making tweak after tweak this last couple of weeks. The GoPro/gimbal setup is an Arris CM3000PRO, a 32-bit SimpleBGC driven unit as pictured below:
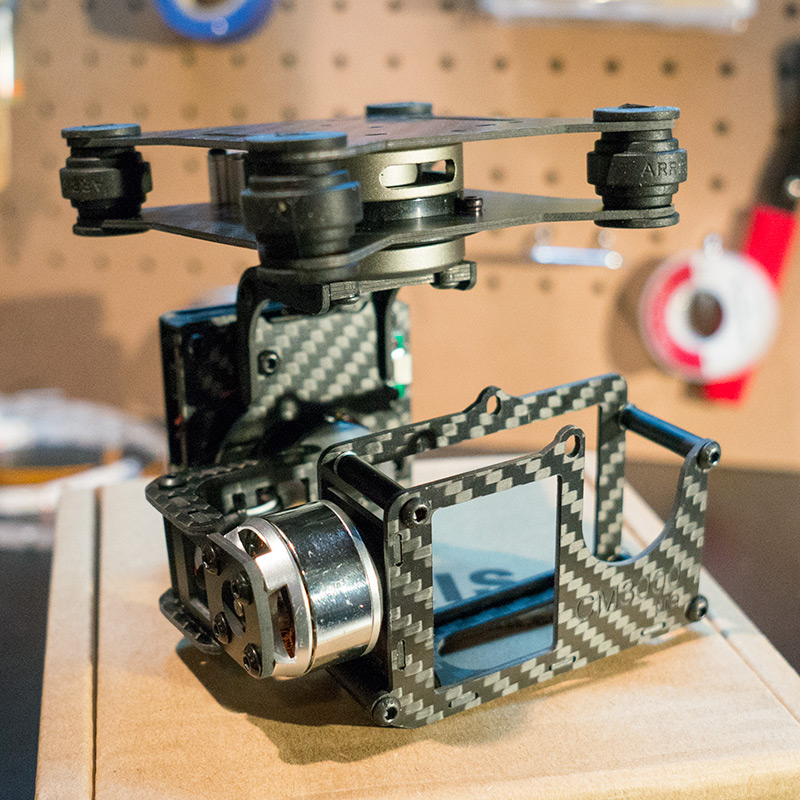
Arris CM3000 Pro Gimbal
I messed with the PID’s for hours and hours. I’d get slight improvements but not good enough. I even messed with the rubber dampening balls which isolate the gimbal from the bird. If I used four soft ones the bad jello was eliminated, but I had “bounces” in the video. If I used harder dampening balls the bouncing went away but the jello came back. A combination of the two was a combination of bouncing and jello.
Almost to the point of giving up on this bird and either selling it on eBay or ripping it apart and buying a new frame, I decided to try something totally different. I found my old CM3000 gimbal, not the “pro” model. This one is 8-bit, rather than 32 bit and just slightly different than the old one One difference is that the top plates which house the dampening balls can hold eight, rather than four. To get the plate to fit on my old DJI Phantom I cut off two of them on one plate, but I still could use six dampeners rather than four. I remembered that setting up my big gimbal on my hexacopter the best results were with a lot of soft dampening balls.
Without even playing with the PID’s of the 8-bit gimbal, I put six soft balls on and flew it. BIG difference. Unreal. Just changing the gimbal alone jumped the video quality from a 5 out of 10 to a 7. I then did many successive fly-analyze-tweak sessions and narrowed the gimbal down to where I thought it was best.
Things were improving but still not good enough.
Dampening Flight Controller
I took a look at the logs from the bird after a while. The MiniX flight controller I’m using stores logs of each flight with some valuable information. One of the items in the log is a vibration graph, showing the vibration level of each flight. The vibration levels, from my experience with the SuperX flight controller (a more expensive product by the same company XAircraft), were way too high even after all the motor replacement and balancing of props and motors. I began to think that though I was certainly making some improvements by adjusting the gimbal, the issues would not be resolved until I reduced the overall vibration of the bird. So now what?

The log above from the MiniX flight controller shows vibrations too high for decent video quality
The instructions which come with the MiniX suggest using their adhesive tape and attaching the controller directly to the frame for best flying results. That’s what I did. But the frame came with a vibration isolation plate and some pink dampening rubber balls to isolate the flight controller from vibration. Some controllers can over-react to vibrations if they’re not insulated from the bird enough, causing very bad flying performance and high vibrations. I thought about my SuperX bird, which has very low vibes and great video quality. That controller is literally mounted on a business card CD as a plate, with 3M 20LB double-sided tape. Yeah sounds funny, but it fit perfect and is made of Lexan, a flexible but highly strong plastic. The CD business card is also attached to the frame with the same tape. That’s more insulation by far than the white double-sided tape that came with the MiniX. I thought of trying that tape, but instead decided to go with the frame’s isolation plate and pink balls. I have yet to look at the logs and compare them since I did that, but that was one part of what made a big difference in video vibes.
Original vibration plate with pink dampening balls…
The first video I shot with the flight controller mounted to the isolation plate was notably better, but just barely lacking in quality.
Neutral Density Filter
I dug through my piles of GoPro stuff and finally found a neutral density filter I bought quite a while ago. The filter attaches to the lens of the GoPro and darkens the amount of light hitting the lens. This in turn makes the camera lower its shutter speed to adjust for the amount of light coming in. This lower speed can make a difference in reducing GoPro vibration and smoothing out the video as well.
At that point I tweaked the “I” in the PIDs of the gimbal a few more times and settled in on what has now produced a couple of minutes of video I’d call high quality, good enough to sell or use for production.
For my own reference or help to others with a similar setup, here are my PID’s for the CM3000 gimbal, 8-bit setup:
Below is an unstabilized chunk of video showing those first few seconds of good video quality without the neutral density filter:
And below is another video of a similar flight, ND filter installed and with some slight stabilization done in Adobe Premier. This is USABLE!
Whew. That’s months of work broken down into 1200 words of a blog post. I hope this setup works the next time I use it.
Now I’m “hoping” this bird can be my more portable solution for aerial video which can be taken on hikes, skiing, traveling and on more mobile applications. The reason I said video and not photo is this is a GoPro and they don’t tend to produce decent photos.
Next for this bird is a 3-axis gimbal setup for a bigger but better point and shoot camera like a Sony RX100 or Canon GX7, and perhaps some bigger batteries.
Conclusion
To sum up the multirotor helicopter video vibration reduction process in a few quick bullets:
Good luck on your build(s) and I hope this helps some of you fellow builders and pilots out there.
Today we are getting our first look at the new Arris Lander-X3 retractable landing gear for larger multi-rotor RC aircraft like hexacopters, octocopters, X8’s, and large quadcopters. This landing gear features very sharp and precision milled aluminum, carbon fiber tubes, and an electronic control board. The gear can attach to the copter via mounting to its bottom plate, or to motor arms in widths from 16-25 millimeters.
Unboxing Video
Arris Lander-X3 Retractable Landing Gear Photos
Here are a few photos of the retractable landing gear out of the box.
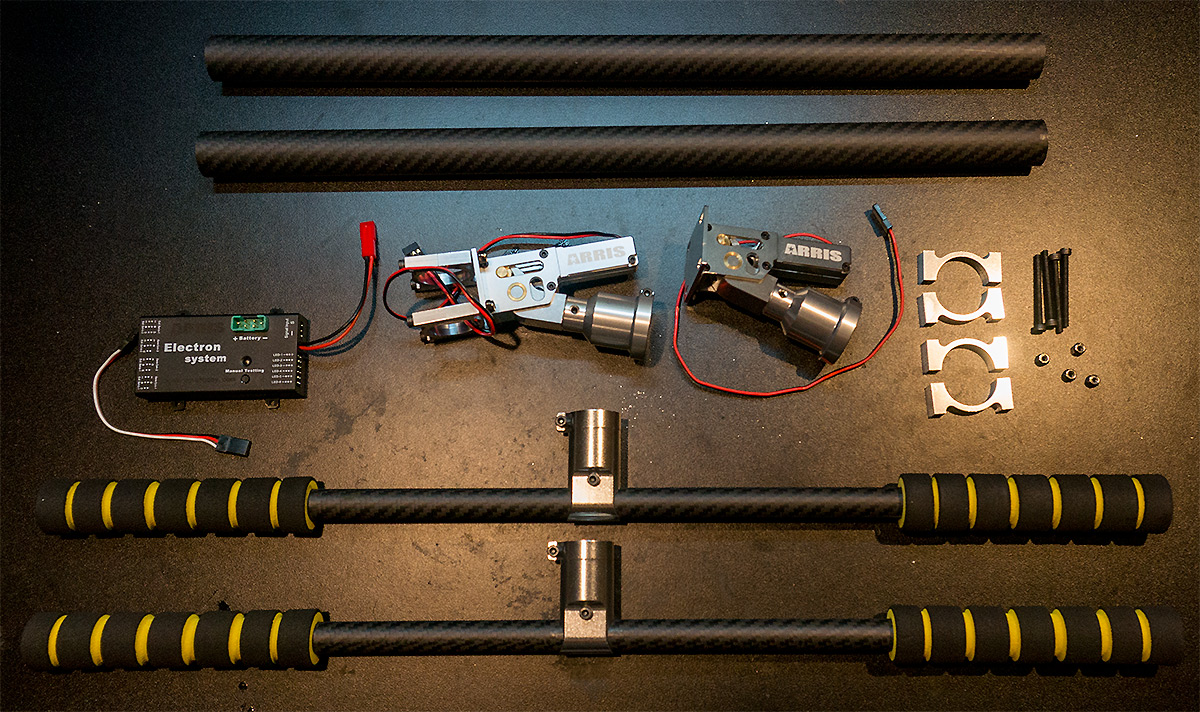
Arris Lander-X3 box contents

Arris Lander-X3 Retract
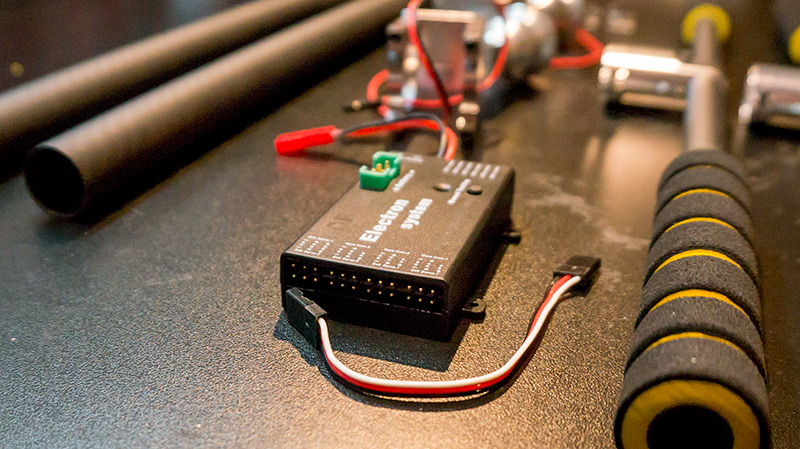
Arris Lander-X3 Control Box
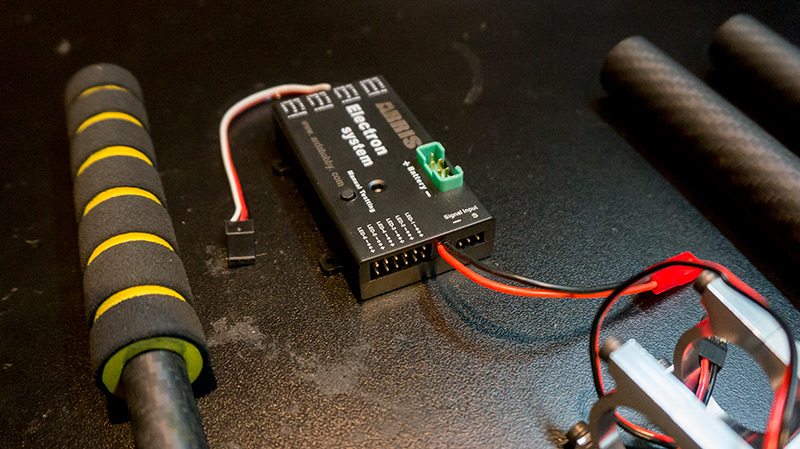
Arris Lander-X3 Control Box
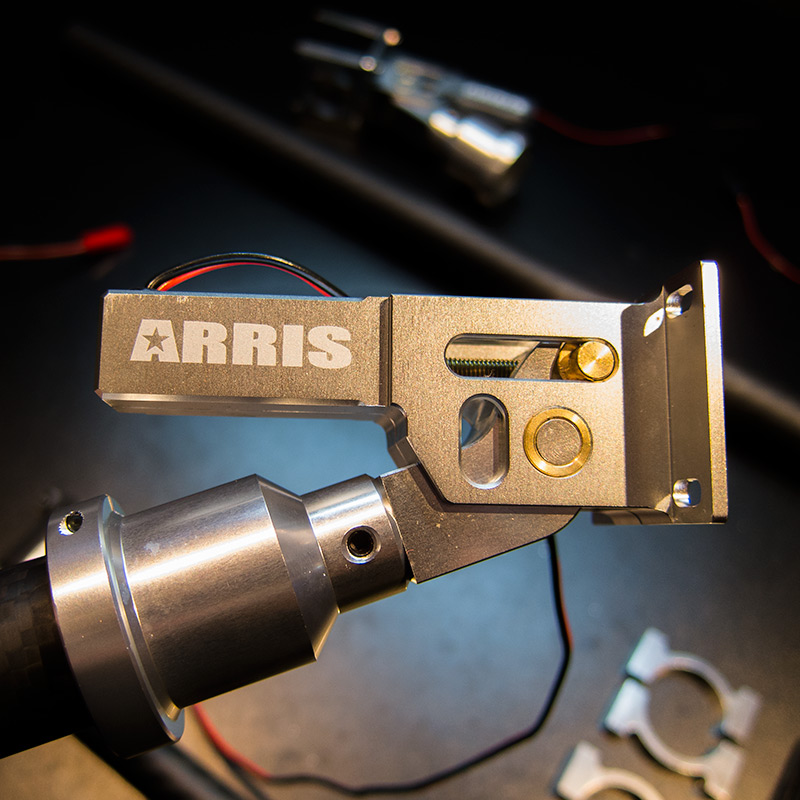
Sharp!
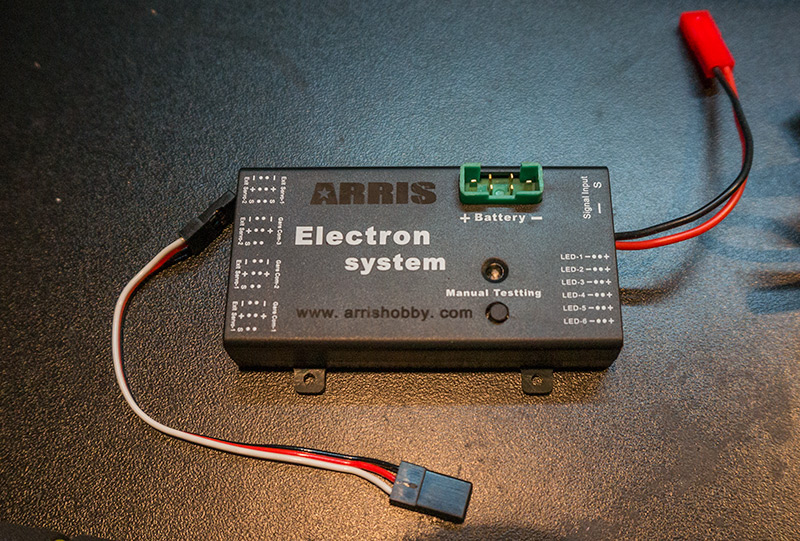
Arris Lander-X3 Control Box
Arris Lander-X3 Retract